Our tool PocketQuery is a great and simple way to get live data from external systems into your Confluence pages. Once you have properly set up a Datasource, it’s easy to start writing Queries and inserting them into your pages left and right. A business report from your SQL database here, a live monitoring dashboard for your infrastructure there, maybe a custom Jira report… All in your Confluence pages, using the PocketQuery macro!

But what about security? Most of the time, SQL Datasources (i.e. databases) are behind a firewall and require secure, encrypted communication. But for REST Datasources it is quite common that they are out on the internet, accessible for everyone, often allowing unintentionally insecure communication protocols.
For this reason, we would like to have a closer look at security in this article and show you what you can do today to make your PocketQuery REST Datasources more secure. We will do this by setting up an example of a custom Jira report and then we will look at how we can improve security from that point on. If you already know how to set up PocketQuery with a REST API you can skip our Jira example and jump directly to our best practice tips about making your REST Datasources more secure.
Setting up a Jira REST API example in PocketQuery
Let’s start by setting up our Jira as a REST Datasource in PocketQuery! For this we need to go to the PocketQuery Administration and create a new Datasource. When creating a REST Datasource we need to decide how we want to authenticate ourselves against the external system. Jira itself supports two authentication mechanisms:
- REST Application Link
- REST Basic (HTTP Basic Authentication)
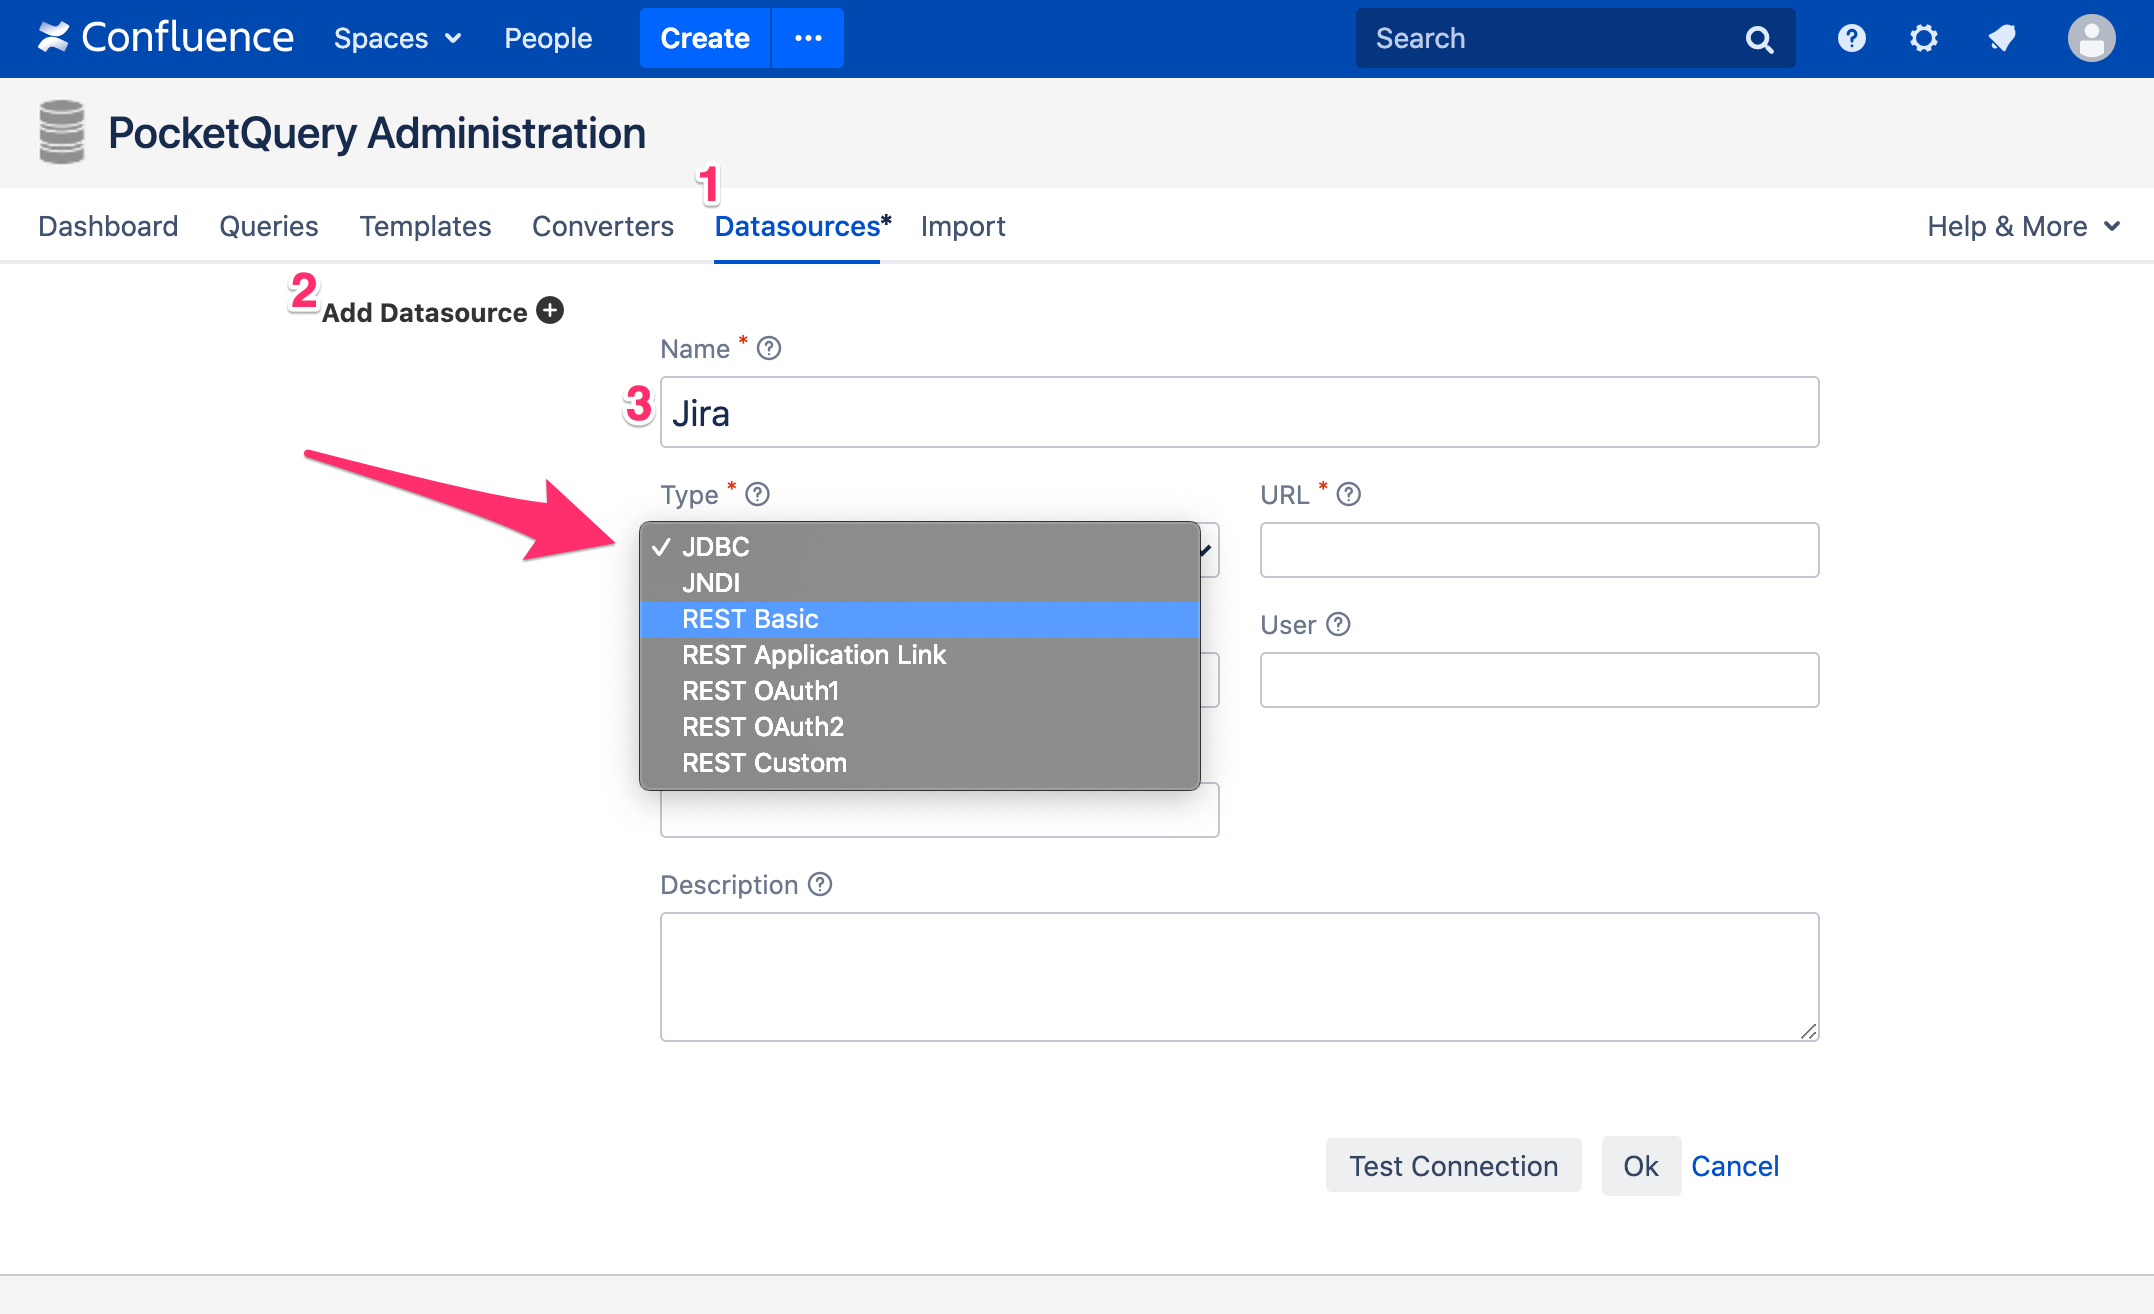
The REST Application Link type is specific to Atlassian products and is therefore not widely supported by other systems. Instead, most of them will require you to go with REST Basic, so that is also what we will choose in this example. With this mechanism, you can specify credentials of a Jira account. PocketQuery will then use these credentials to authenticate itself against Jira.
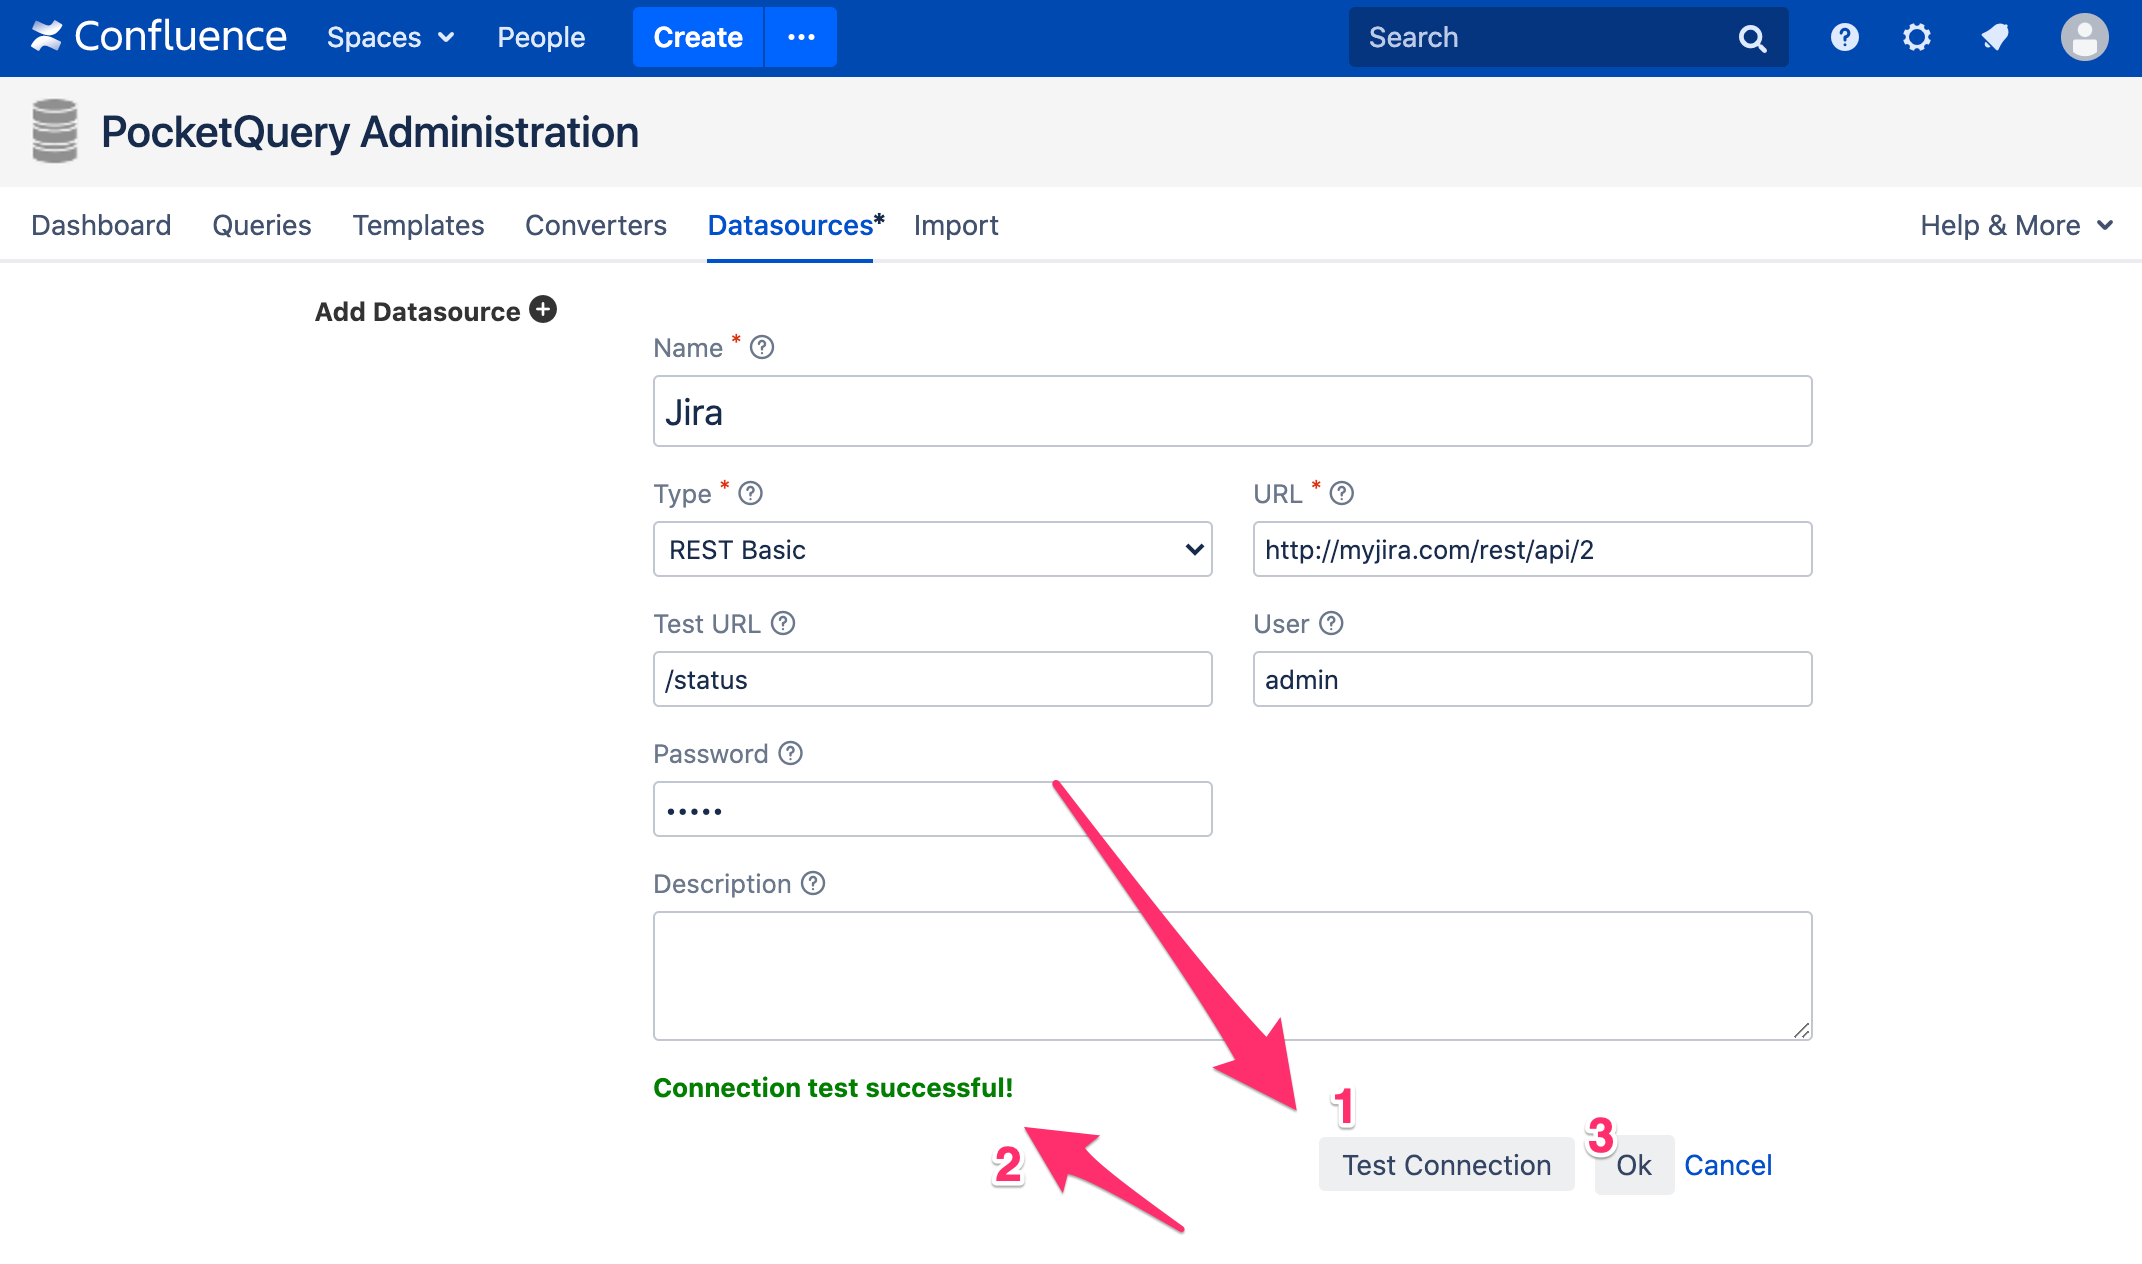
Now, let’s go ahead and choose REST Basic as the type of your new Datasource and enter the URL that points to your Jira REST API. After entering a valid user and password, you can enter a test URL (e.g. /status) and click the “Test Connection” button. If everything works, you should see a green message saying that your connection test was successful.
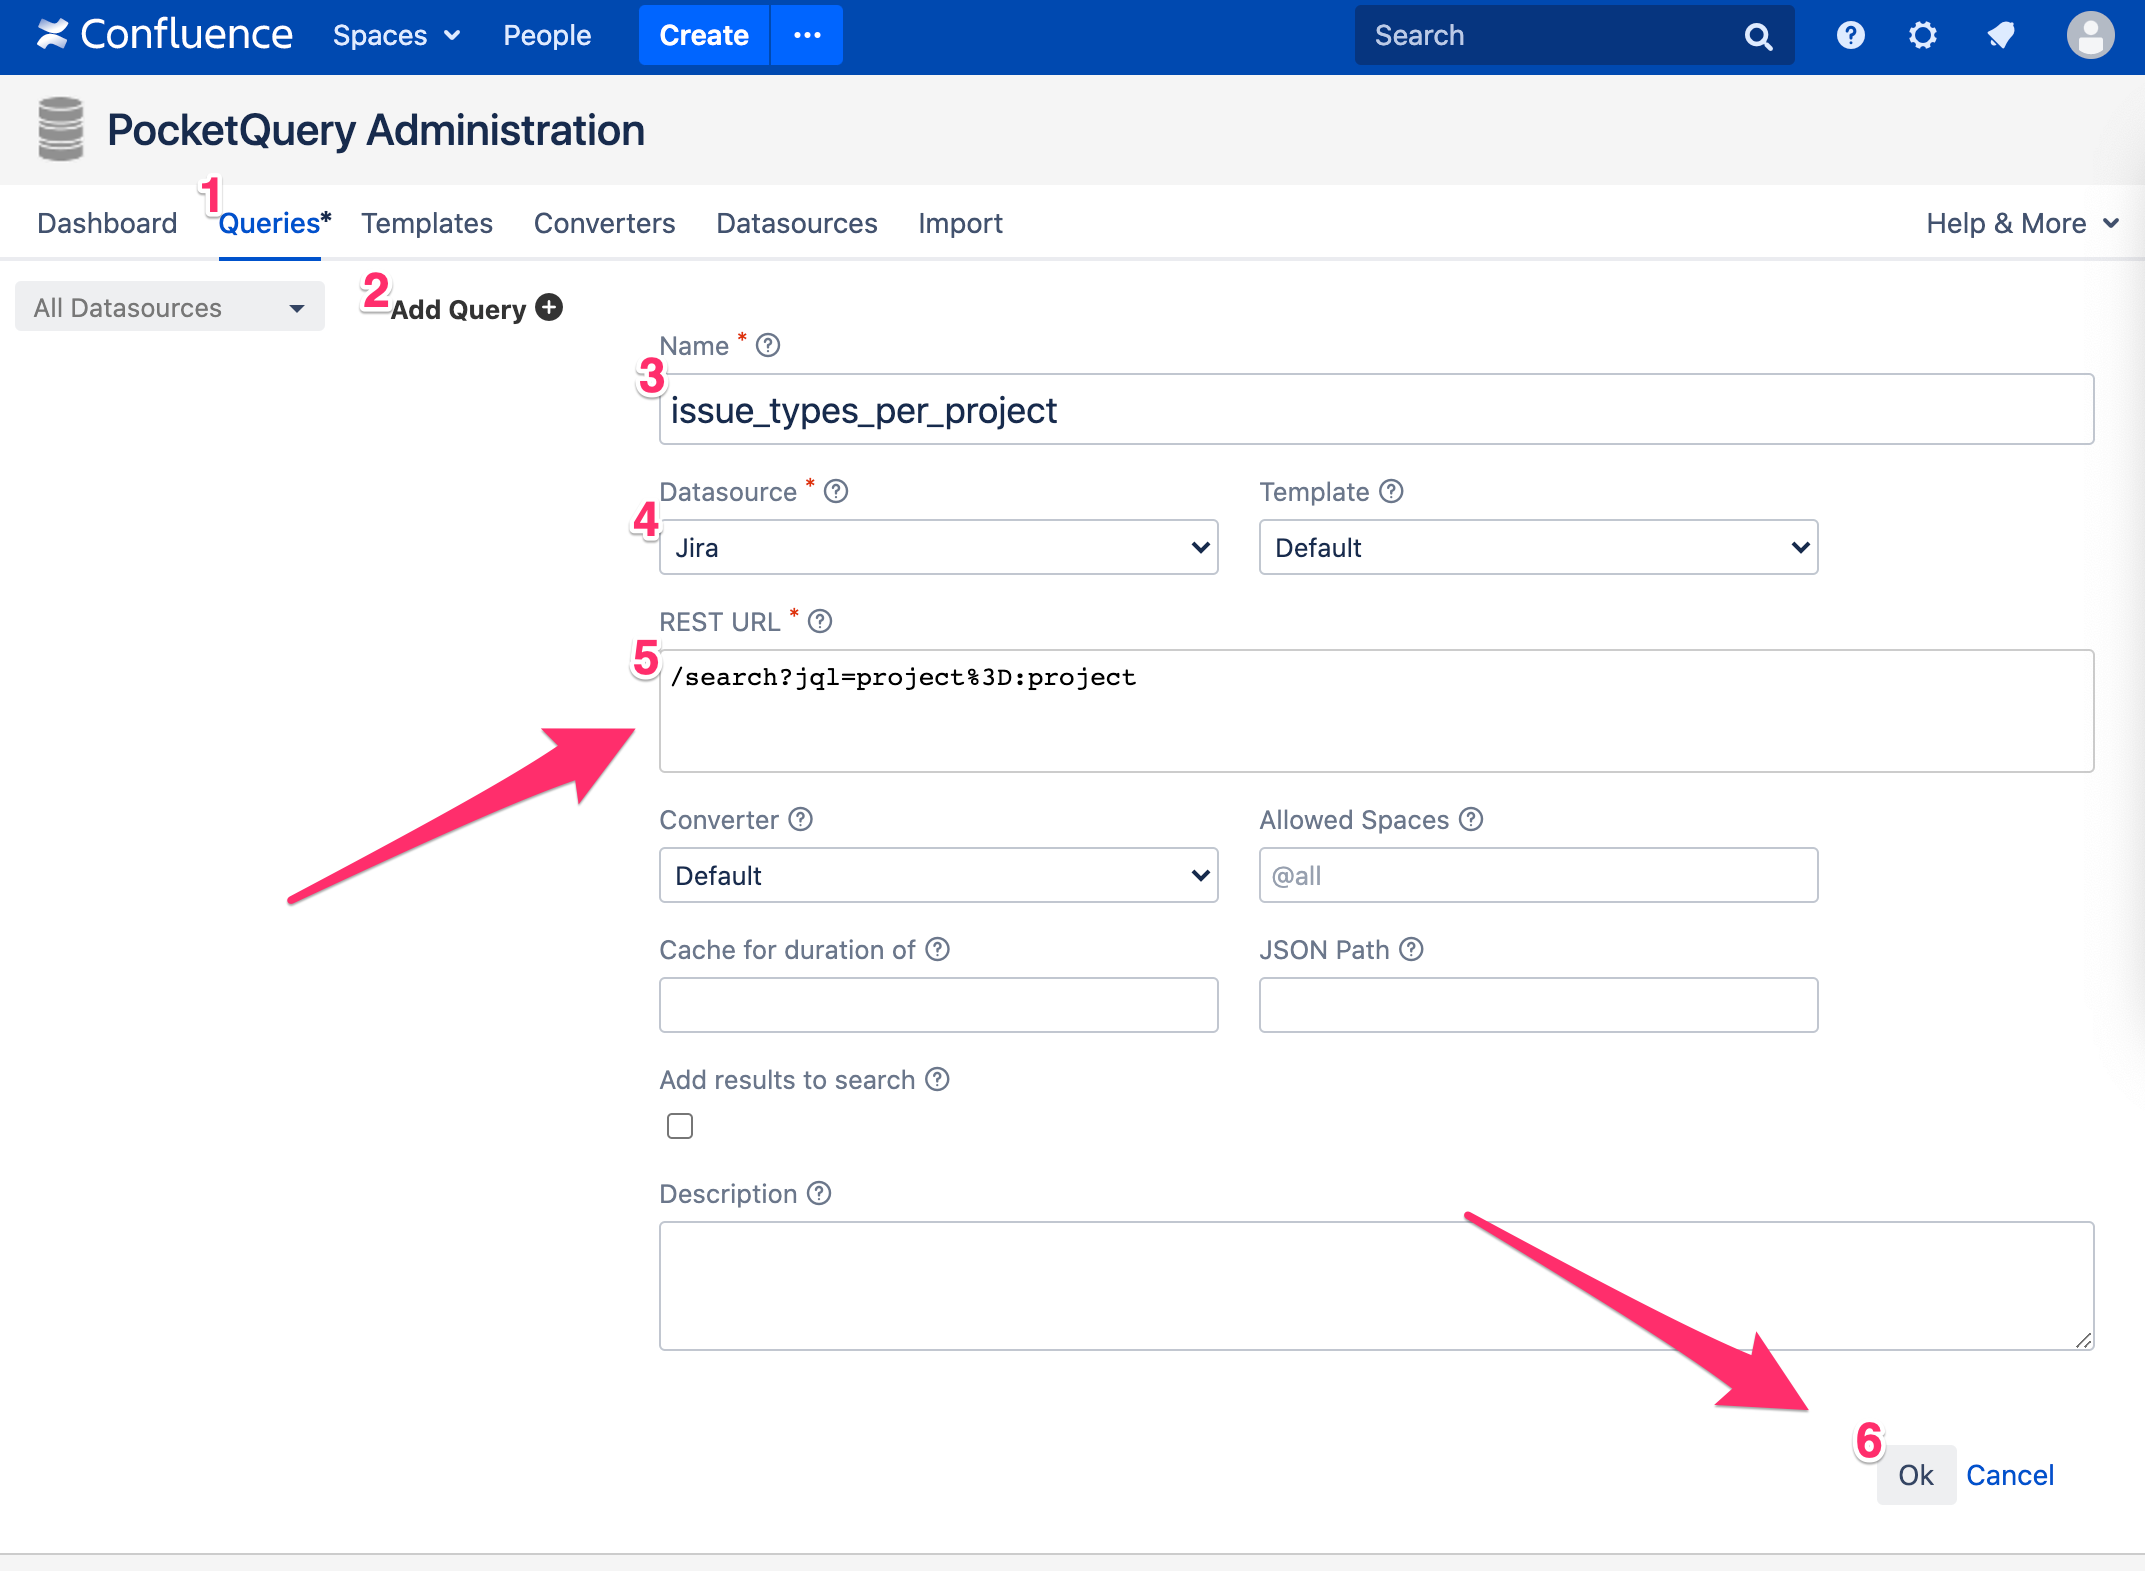
Great! We’re all set up and can now pull data from Jira into our Confluence pages using the PocketQuery macro. For demonstration purposes we will set up a small example that counts the amount of tickets per issue type for a given project. To do so, we need to fetch the issues for a given project and then count the amount of tickets for each issue type. To get the tickets for a project, we want to execute a small JQL query that looks like this:
project = :project
This will provide us all issues for a given project (:project is a parameter that will be replaced by an actual project key when the Query is executed). To execute this JQL, we need to call Jira’s search endpoint and pass along our JQL statement. This means, in PocketQuery we’ll want to create a new Query with this as its REST URL:
/search?jql=project%3D:project
PocketQuery will automatically recognize `:project` as a parameter and will let you specify a value for it in the PocketQuery macro later.
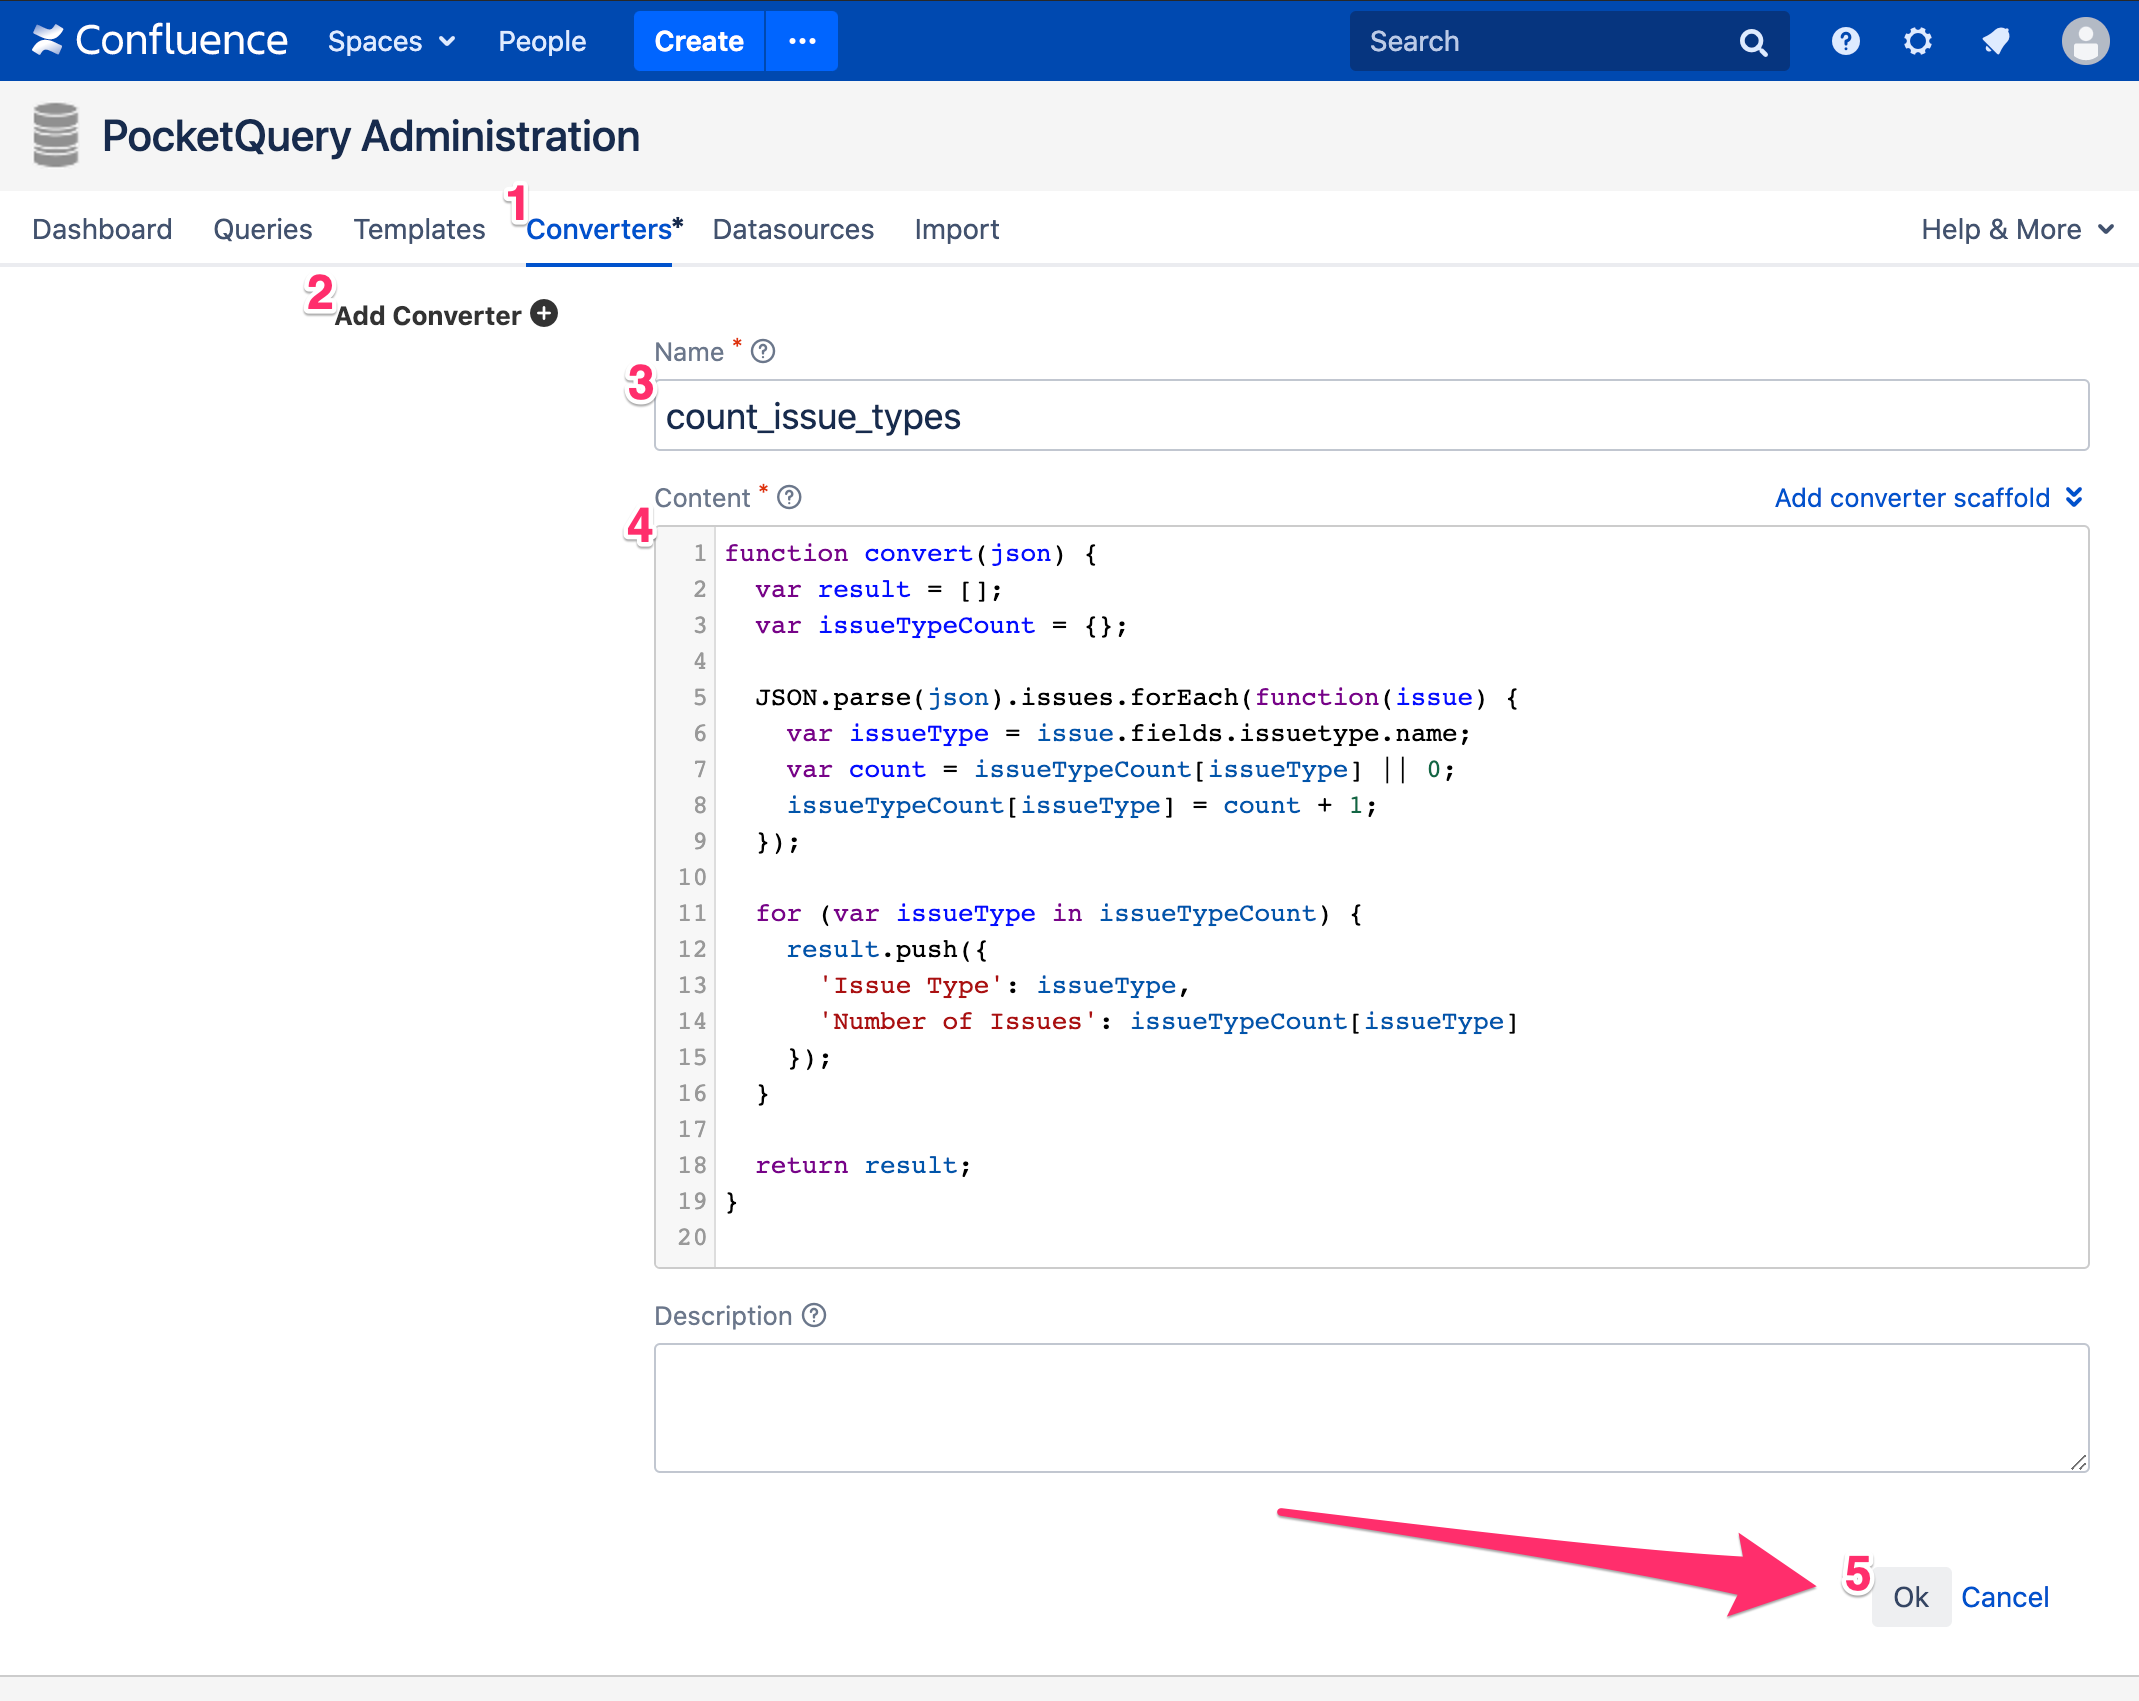
Now, before we can use the PocketQuery macro to see the result of this REST Query in our Confluence page, there’s one more task left for us to do: we need to clean up the JSON that we get back from Jira and count the tickets per issue type. This can be accomplished via the use of a Converter.
A Converter is a simple JavaScript function that takes in the raw JSON result from your Query and puts out properly formatted (and possibly sorted, re-arranged, transformed, etc.) data. In our case we would like to count the amount of tickets per issue type, so this Converter will do:
function convert(json) {
	var result = [];
	var issueTypeCount = {};

	// Count how many issues there are for each issue type
	JSON.parse(json).issues.forEach(function(issue) {
		var issueType = issue.fields.issuetype.name;
		var currentCount = issueTypeCount[issueType] || 0;
		issueTypeCount[issueType] = currentCount + 1;
	});

	// Create a table out of the counts
	for (var issueType in issueTypeCount) {
		result.push({
			'Issue Type': issueType,
			'Number of Issues': issueTypeCount[issueType]
		});
	}

	return result;
}
PocketQuery expects your data to be well-formatted and tries to interpret it as a table. For this reason, REST Queries usually require a Converter (unless the raw result data is already formatted correctly).
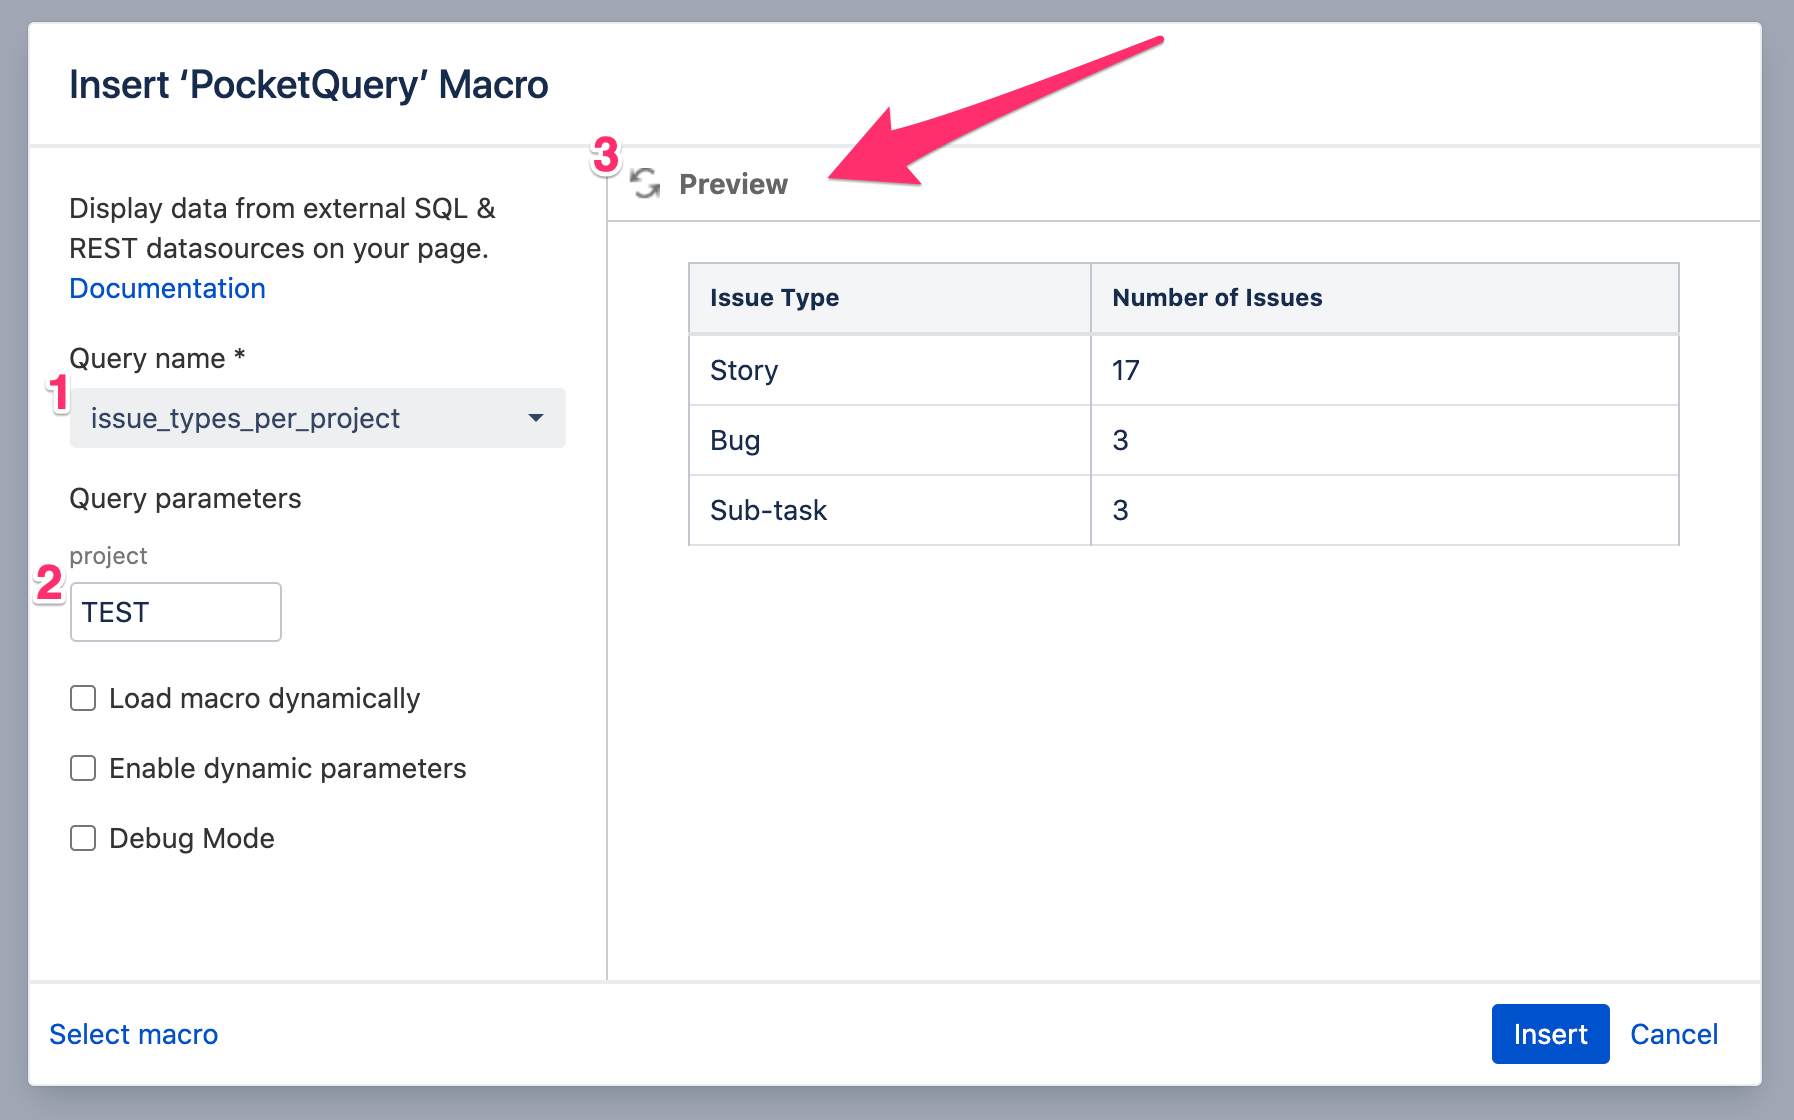
Awesome! Once we have created this Converter and selected it in our Query, we can insert the PocketQuery macro into a page. Here, we can now select our Query and enter a value for the :project parameter. The result is a table, containing the number of issue types–which is exactly what we wanted.
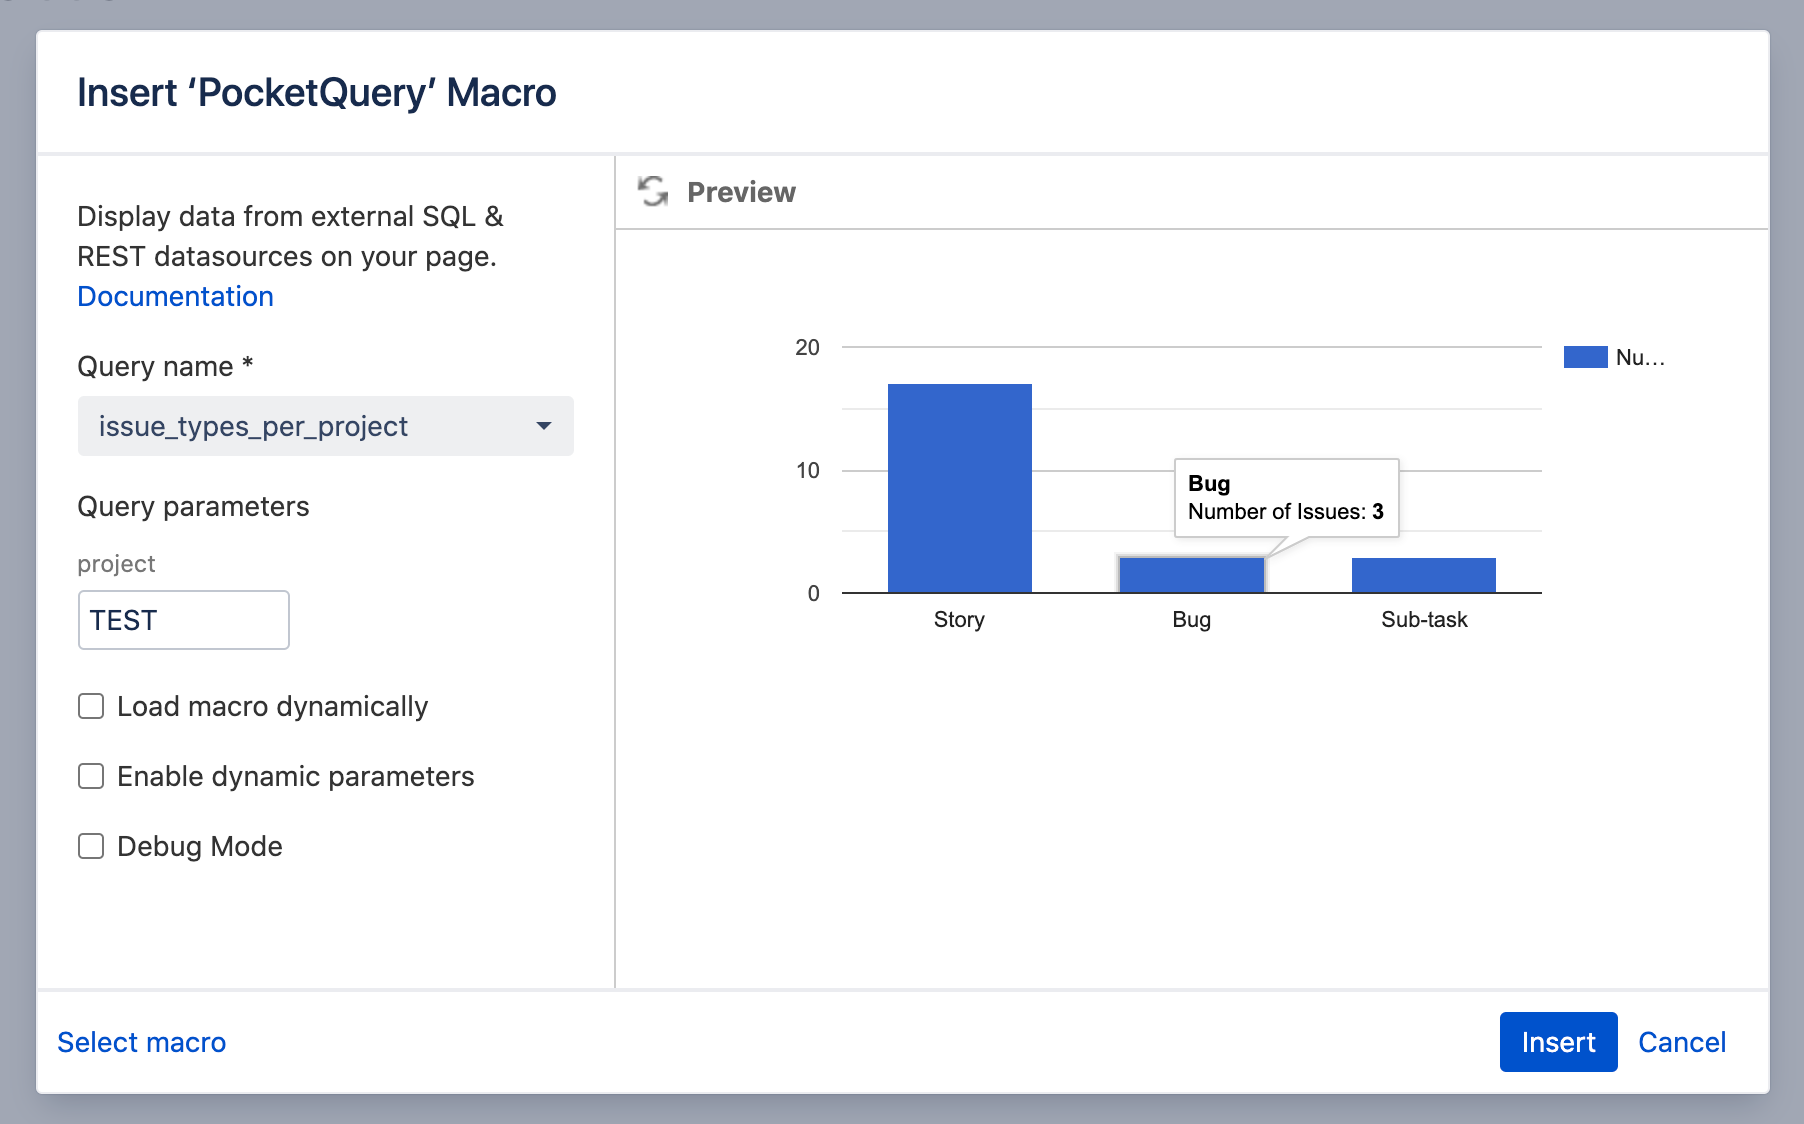
If you want to control how your result looks in the page, simply create a custom Template for your Query. With Templates, you can specify exactly how your result shall be rendered, utilizing the combined power of the Velocity templating language and our PocketQuery Template API. For example, if you prefer a chart over a table, this would be the only code required for your template: :
<script>PocketQuery.chart('ColumnChart')</script>
As you can see, we can now use PocketQuery to create Queries of all kinds and display data from Jira in our Confluence. So, let’s talk about security and what can be improved for this use case.
Making your PocketQuery REST Datasources secure
From a security perspective, there are 2 points of concern with what we just did:
- If you look back at the part where we created our Datasource, you’ll notice that the URL pointing to our Jira instance started with
http://. This will lead to insecure communication between PocketQuery and Jira and is a common mistake. Always make sure your Datasource URLs start withhttps://to allow secure, encrypted communication. - As is common with REST Datasources, we used the HTTP Basic mechanism for authentication. This is a widely supported and widespread way of authenticating against REST APIs. Unfortunately there is one big problem: it is using passwords.
Here are some major reasons why you should avoid using your password in a call to any API:
- Passwords are frequently reset. Every single time you change your password, any connections that were created with your credentials will break. You will need to replace the new password in all of them.
- Third parties may have to store your password in their databases in cleartext, or at least using a reversible encryption mechanism without hashing.
- If a connection to a REST API is somehow sniffed, the password will immediately be compromised and force a reset. Additionally, in Single Sign On scenarios Jira users will not have a local password anyway.
Therefore, it would be a lot better to replace those passwords with API Tokens. But what can you do about this if your REST API only supports Basic Authentication, as is the case with Jira? Well, luckily this problem has been solved by re:solution.
How to generate an API token for the Jira Rest API
With API Token Authentication for Jira, you can create personal access tokens to replace user passwords. The basic creation flow is inherently simple.
Steps:
- Get the app from the marketplace and install it.
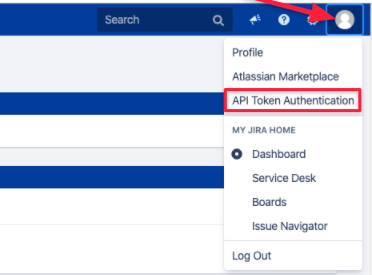
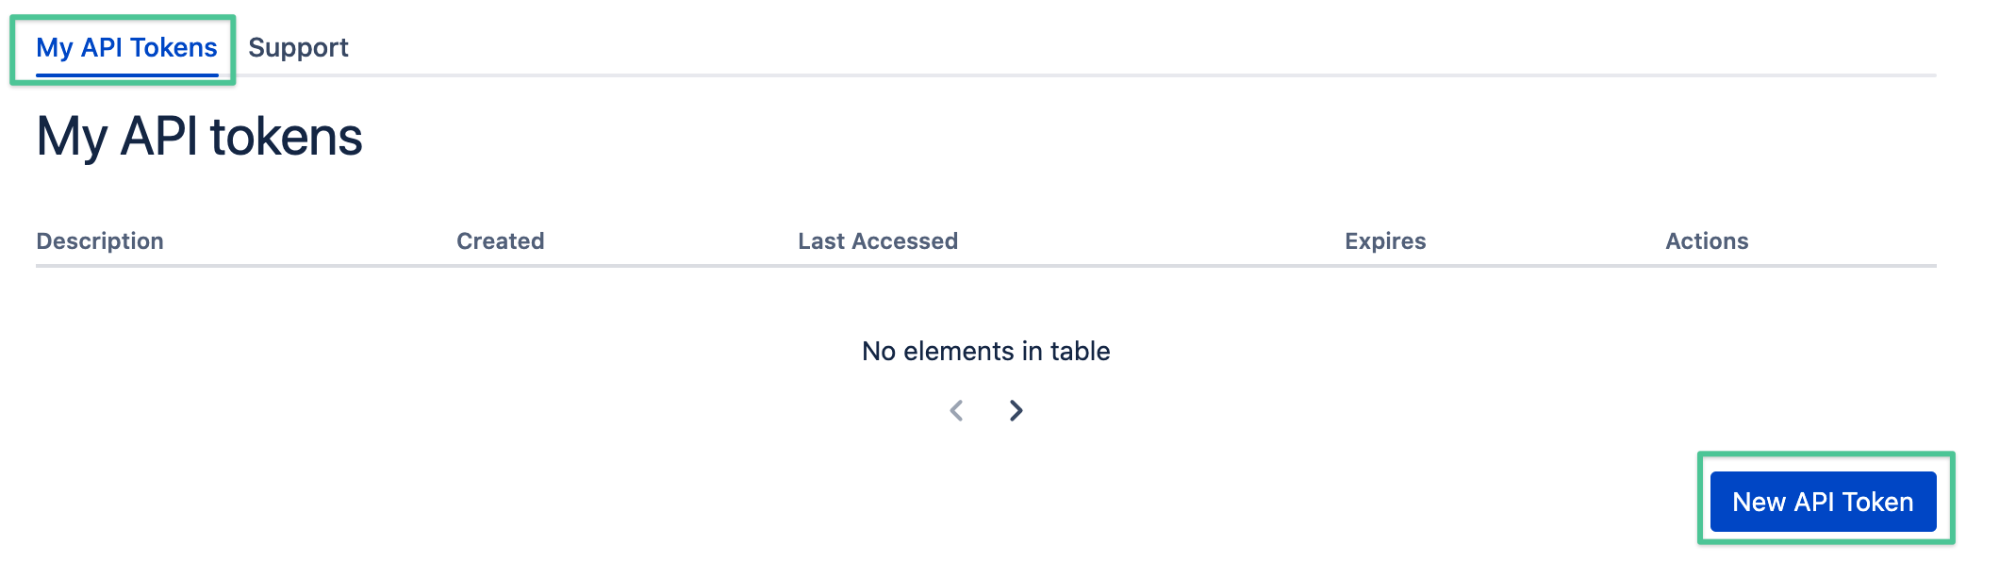
- Access the app from within Jira.
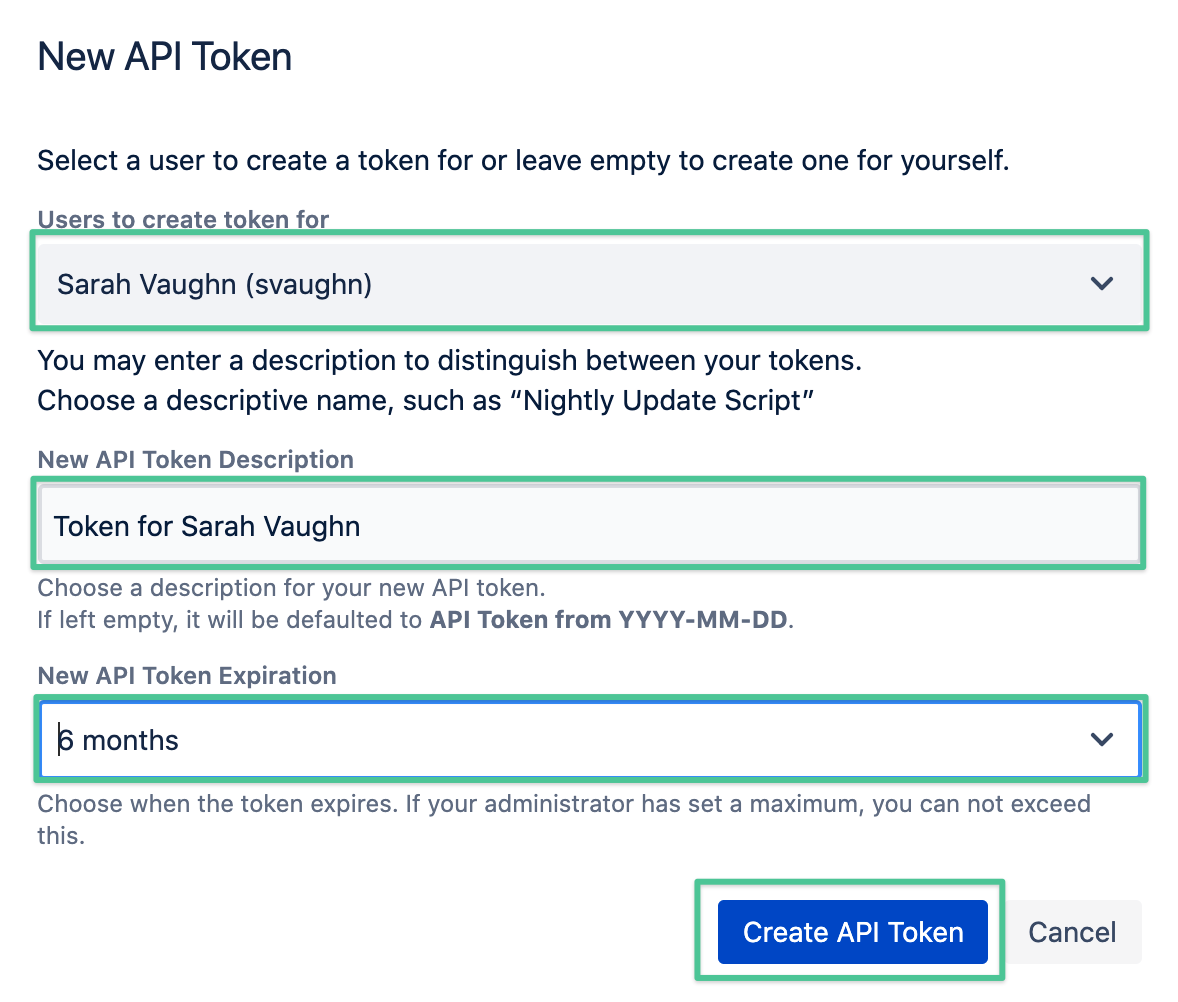
- Create a new API token.
- Provide a name and set an expiration date (optional).
Voilà!
This approach offers a great trade-off between usability and security:
- Users can still access the Jira API with all their rights.
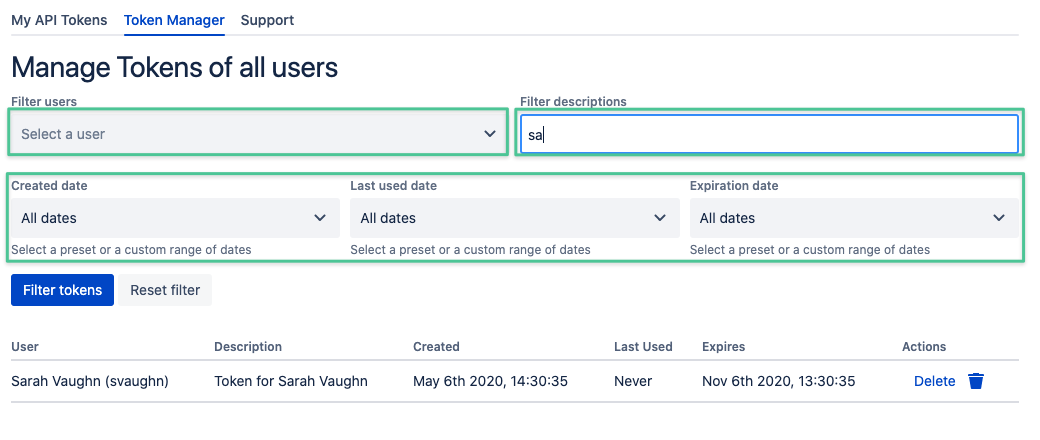
- Admins will be able to see a list of all the generated tokens, together with their usage; and will have the power to remove tokens that are not being used.
- Token replacements will not impact user accounts, which will still be able to authenticate with their regular credentials.
Practical considerations for managing API Tokens
- Administrators can set a maximum lifetime for tokens. This is an important restriction to take into account when creating reports that are intended to persist in time.
- Instruct your users to create one token for each API connection. This will make it easier to eventually replace them when they expire.
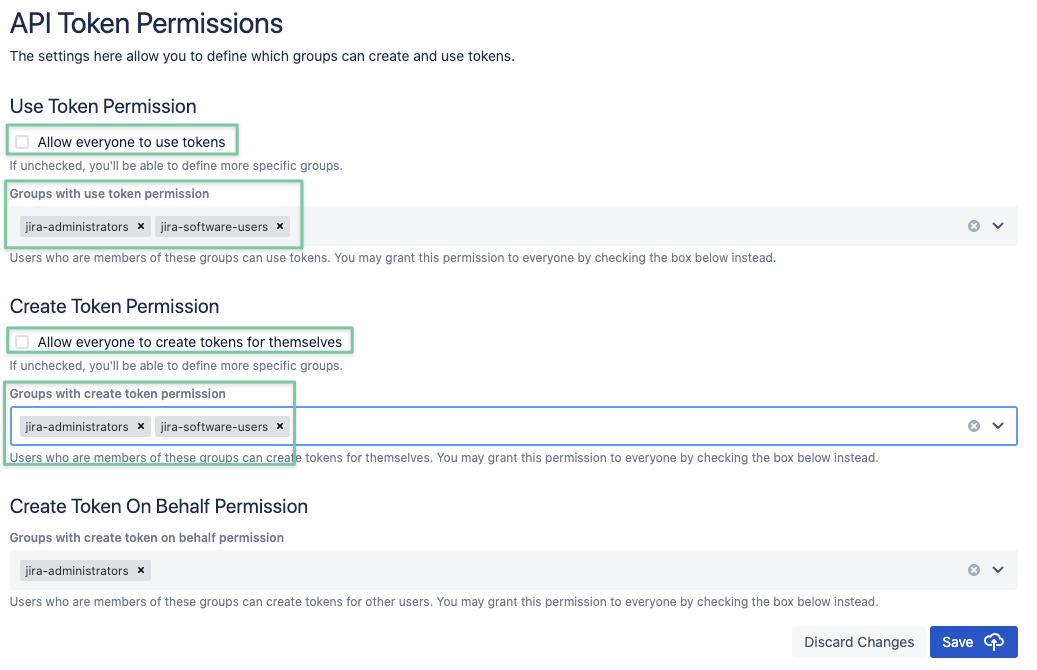
- The default permission settings will allow every user to create tokens. You can change this and define which groups can create tokens for themselves, and which groups can create tokens on behalf of others, as well as revoke tokens created by other users. Check the administration guide for more details on permissions.
Thanks for reading! What’s Next?
- Stop by the Atlassian Marketplace and find more awesome apps by re:solution
- Read about how we placed #2 in Atlassian’s recent Hackathon “Codegeist 2020” with our app “Lively Recorder for Confluence”
- Contact us by writing an email to support@livelyapps.com

.png)
.png)


.png)
.png)
.png)